The Most Important Piece of
Furniture
There is absolutely no
need to have your kitty declawed for the sake of protecting your
furniture. A declawed cat is left almost defenseless and it is a cruel and
barbaric practice. For more information and graphic pictures of declawing,
please visit http://declaw.lisaviolet.com/
Remember though that a scratching post is not a replacement for feline
pedicures. Kitty’s nails still need to be trimmed
carefully.
Cats NEED to scratch, as it is
the process whereby they remove the outer sheath (dead layer of nail).
Have a look around the scratching post and you will find those discarded
sheaths. Do not be alarmed! If cats aren’t allowed to scratch and remove
the outer sheaths, they could resort to chewing their paws and this could
lead to cuticle problems.
So where is a good place for
kitty to scratch? A Scratch post, of course! Not only is it necessary for
their nails, but it is also a therapeutic tool for natural feline behavior
to stretch the back and muscles. Therefore, it is recommended to invest in
a scratch post that is taller than the height of your kitty, so they can
reach up while scratching.
If you don’t supply kitty with
a scratch post, she will find other items to use, like the beautiful and
expensive sofa. No matter how hard you try to dissuade her from using it,
she will just find another item of furniture or carpet, or worse still ...
she will wait until you are not around and continue her
behavior.
So, now you have supplied
kitty with a scratch post and she still continues to scratch at the sofa
or undesirable places. Do not use negative behavior training but instead
make the furniture unappealing to her. Cover her favorite spot with
self-adhesive paper. It will not suit the rest of your interior but it is
only for the duration of the good behavior training.
Place her scratch post near
the now-taboo favorite spot and take kitty to it. Use your own fingers to
scratch the post and make sounds of enjoyment. Do NOT drag kitty’s paws up
and down the post! She will soon copy you and realize that the new scratch
post is much better than the sofa. Once kitty is used to the scratch post,
you can gradually move it to a position where you would like it, a small
distance each day so that you don’t confuse kitty again. Don’t place the
scratch post in a room that is hardly used or where kitty will feel
lonely. She will like it to be near enough her human companions where she
can feel included. Once kitty is only using the scratch post, you can
remove the self-adhesive tape from the taboo places.
It is highly recommended that
you have as many scratch posts as you have space for. They don’t all need
to be big and take up too much space. A smaller one close to her food and
water bowls is ideal. One by the back- or front door will be greatly
appreciated.
When buying a scratchpost,
look for the following :
- A sturdy base plate (thick and
big)
- Check stability
- Check that only rough,
non-fraying carpeting is used (Berber and Timbavati are
highly recommended)
- Avoid anything where
cheap sisal string is used instead of the thicker, durable sisal
rope
- Establish what guarantee is available on workmanship and
quality of the product
They don’t all have to be
traditional scratch posts! A simple and economical scratching post could
be some sisal rope tightly wrapped around the dining room table leg, or
you could wrap some sisal rope around a narrow piece of wood and jam it at
an angle against a door. A horizontal scratchpad is also recommended for
those cats that enjoy scratching carpets rather than stretching up a post.
In that case, make sure that the base is heavy and covered with a very
rough carpet, unlike any of that in your house.
Although not aesthetically
pleasing, you could cover an old wooden stepladder with sisal rope and
rough carpet. Construct some hammocks between the rungs and you have a
cheap kitty-condo!
When choosing a scratch post,
choose the roughest carpet! Don’t think that kitty would want to scratch
on a soft, fluffy carpet! The best description I ever heard was that you
should compare the texture of the carpet to a human nail file. The
rougher, the better it will work! They really want to sink the claws into
the material and pull and stretch! You also want to discourage them from
scratching and pulling on any kind of carpeting or upholstery you have in
your home.
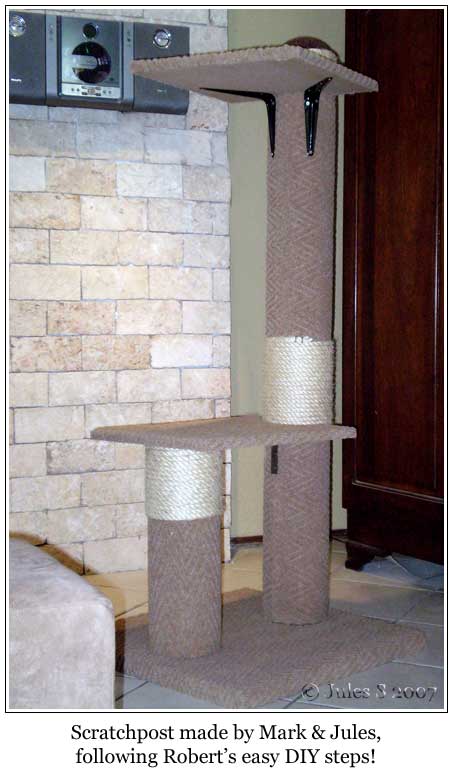
Make your own scratch post! Even if you are
not a good do-it-yourself-er and have more thumbs than fingers, it is much
easier than you think! Here is a very simple, basic scratching post that
you can start off with and as you go along, you will plan your next DIY
scratching post with more enthusiasm and ideas ... eventually you will be
able, and want to, make a beautiful cat tree house or kitty
condo!
Click here to see the original large building picture.
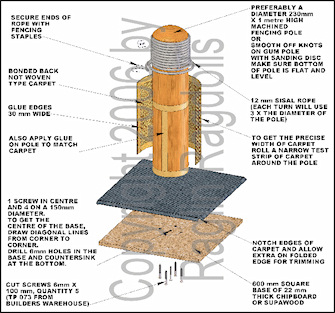
Start with the base:
Lay the base on the underside of your carpet and cut the
carpet about 25 mm bigger all round than the base. Cut out the corners so that they
won't overlap when you fold the carpet over the edge of the base. Apply contact adhesive to the top
and side edges of the base and the matching areas of the carpet. Leave it to dry for 15 to 20
minutes. When dry to the
touch, lay the carpet on a flat surface, glue-side up, and carefully
position the base (glue side down) on the carpet. Warning: If you get it wrong, you
won't be able to move the wood on the carpet as the glue bonds on
contact. Use strips of wood
between the carpet and base while you position the base, or cheat a little
bit and position it while the glue is still wet (it won't stick as
strongly though). Press down
firmly to bond the carpet to the base. Fold the edges over and using a
hammer, knock the carpet firmly to the edge of the board
Prepare the pole:
Cut a strip of carpet about 800 mm long and 20 mm wide. Wrap this around the pole to
measure the width of the carpet you will need to cut to fit around the
pole. Determine the height
your cat will find comfortable to scratch on the sisal and cut the height
of your carpet to suit. Wrap
your cut carpet around the pole to check the fit and draw a line on the
pole along the join line of the carpet. Apply contact adhesive to the
edges of the carpet and matching areas on the pole, don't forget the
vertical line, and allow it to dry for 15 to 20 minutes. Place the pole on a flat surface,
with the vertical glue seam up, and carefully line up the edge of the
carpet with your pencil line.
Press this edge into contact with the pole and then roll the pole
onto the carpet to attach the pole smoothly to the
carpet.
The sisal rope:
You will need about 25 metres of rope the cover 400 mm of
the pole. Attach the end of
the rope to the pole along the top edge of the carpet with a couple of
fencing staples (the type that you use with a hammer). Wind the rope, about 3 turns at a
time, tightly around the pole each time hammering the coils tightly
together. Fix the end of the
rope with a couple of fencing staples.
Prepare to assemble:
From the underside of the base, drill a 6 mm hole in the
centre and draw a 150 mm diameter circle using this centre. Drill 4 more holes equally spaced
on this circle. You will need
to countersink the holes from the underside so that the screw heads don't
protrude. Drill a 4 mm hole
in the centre of the pole as deep as possible. Put the centre screw in the base
and attach to the pole. Drill through the remaining 4 holes with the 4 mm
drill into the pole and fit 4 more screws. The screws need quite a lot
of torque to fit, so you will need to use a power screwdriver or drill to
tighten them.
Finish:
Trim any excess carpet flush with the base using a Stanley
knife (box cutter). Sprinkle
catnip on the base and watch kitty enjoy the pole!
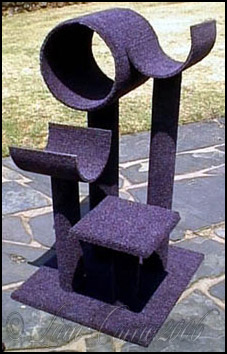
Once you have had some
practice, have a look around and get some ideas for making a kitty jungle
gym. The ones shown here, are a lot of fun to make, and very cheap.
Collect cardboard tubing of different diameters and covered it with the
roughest carpet you could find. Off-cut pieces of flat wood were turned
into base plates and shelves. Small plastic wastepaper baskets (with the
bottom cut out) make cozy tunnels. You could even cut out the bottom of a
bin, cut it in half and have a sturdy hammock! Once you have the various
tubes and tunnels on hand, loosely construct a gym and see where you can
improvise. Sometimes it seems to be the most fun to design and build as
you go along!
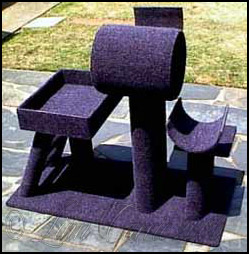
Here are some examples of
kitty jungle gyms we designed and built
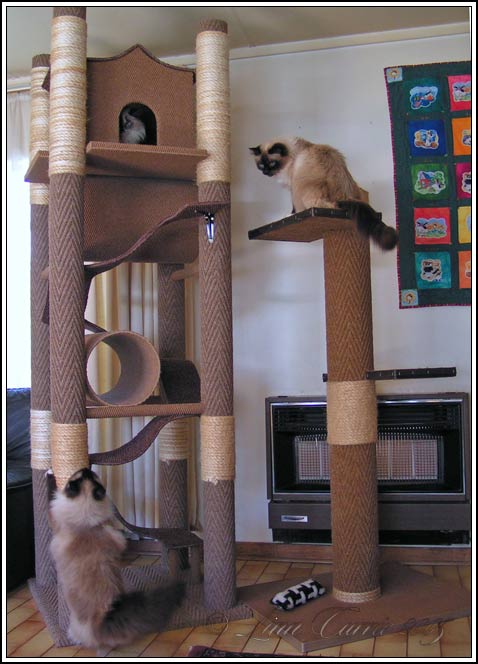
Designs copyright 2006 by Raglin
Ragdolls

Designs copyright 2006 by Raglin
Ragdolls
 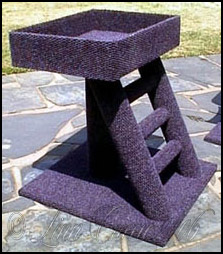
Designs copyright 2006 by Raglin
Ragdolls

|